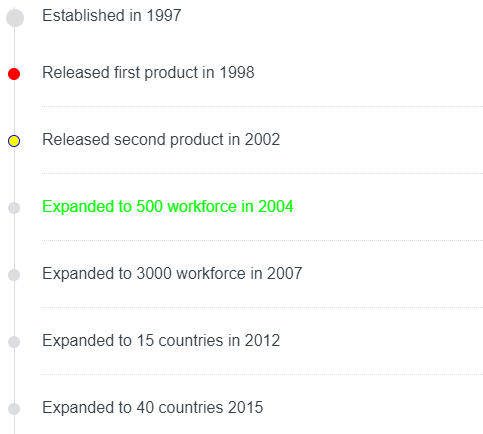
Timelines can be created with pure HTML and CSS. However, it often takes a lot of time to design it from scratch. If you want to get it done quickly, you can use this little package which is just 26kb when unpacked.
First of all, install it by running:
npm i vue-cute-timelineOnce installed, you can now use it in your Vue component as follows:
<template>
  <div id="app">
    <timeline>
      <timeline-title>Established in 1997</timeline-title>
      <timeline-item bg-color="#ff0000"
        >Released first product in 1998</timeline-item
      >
      <timeline-item line-color="#0000ff" bg-color="#ffff00" :hollow="false"
        >Released second product in 2002</timeline-item
      >
      <timeline-item font-color="#00ff00" :hollow="false"
        >Expanded to 500 workforce in 2004</timeline-item
      >
      <timeline-item :hollow="false"
        >Expanded to 3000 workforce in 2007</timeline-item
      >
      <timeline-item :hollow="false"
        >Expanded to 15 countries in 2012</timeline-item
      >
      <timeline-item :hollow="false"
        >Expanded to 40 countries 2015</timeline-item
      >
    </timeline>
  </div>
</template>

<script>
import { Timeline, TimelineItem, TimelineTitle } from "vue-cute-timeline";
import "vue-cute-timeline/dist/index.css";

export default {
  name: "App",
  components: {
    timeline: Timeline,
    "timeline-item": TimelineItem,
    "timeline-title": TimelineTitle,
  },
};
</script>
Code language: HTML, XML (xml)
In the above file, we’ve imported the components in line 28 and the required CSS styles in 29.
We’ve then used the components in our template in lines 3, 4, and 5. We’ve then repeatedly used the timeline-item component.
Here’s what each of these components means:
- timeline: The timeline container component
- timeline-title: The title of the timeline segment
- timeline-item: This is where we keep the timeline content
This is what the above code would generate:

You can find a working version of the above code from my repo links below:


