Vue 2 comes with tons of time pickers, however, we don’t get many choices for Vue 3. Unless we use a Vue UI library that comes with inbuilt time pickers, there ain’t many options.
Luckily, the creator of the popular vue2-timepicker has started working on a version for Vue3. Although it’s still in beta, the basic features seem to work just fine.
Here’s how we can use the vue3-timepicker in our Vue 3 app.
Run the following command to install the library:
npm install vue3-timepickerOnce done, we can now import the library and use it however we want. It’s worth notifying that since the library is an upgrade from its Vue 2 version, all the props and functions are still the same. We can find a detailed list of API for Vue 2 version here.
Here’s our implementation for the time picker:
<template>
  <div>
    <div class="time-preview">
      <div class="time-preview-time">
        {{ timeData.hh }}: {{ timeData.mm }}:
        {{ timeData.ss }}
        {{ timeData.a }}
      </div>
    </div>
    <vue-timepicker :format="timeFormat" v-model="timeData"></vue-timepicker>
  </div>

</template>

<script>
import VueTimePicker from "vue3-timepicker";
import "vue3-timepicker/dist/VueTimepicker.css";

export default {
  name: "App",
  data() {
    return {
      timeFormat: "hh:mm:ss a",
      timeData: {
        hh: "09",
        mm: "15",
        ss: "00",
        a: "am",
      },
    };
  },
  components: {
    "vue-timepicker": VueTimePicker,
  },
};
</script>

<style>
#app {
  font-family: Avenir, Helvetica, Arial, sans-serif;
  -webkit-font-smoothing: antialiased;
  -moz-osx-font-smoothing: grayscale;
  text-align: center;
  color: #000000;
  margin-top: 60px;
}

.time-preview {
  border: 1px solid #eee;
  max-width: 400px;
  text-align: center;
  margin: 0 auto;
  margin-bottom: 20px;
  padding: 15px;
  background: rgb(70, 25, 173);
  color: #fff;
}

.time-preview-time {
  font-size: 30px;
}
</style>

Code language: HTML, XML (xml)
In the above file we’ve first imported the library and the CSS through lines numbers 14 and 15. We’ve then defined the time format and the time data from lines 21-27. We’ve also registered the imported component on line 31.
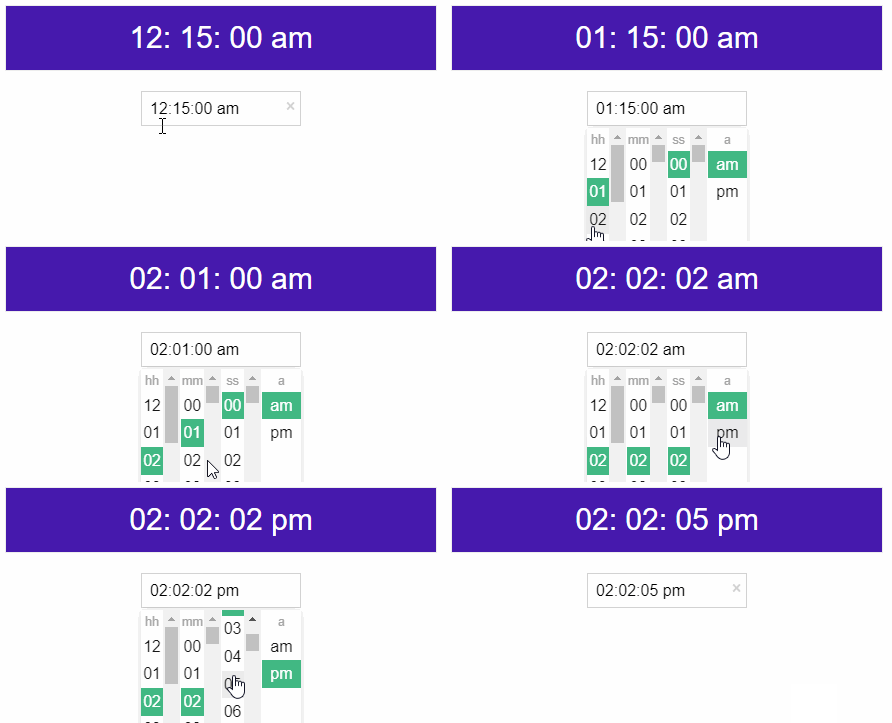
Finally, we’ve used the component on line 10. We’ve also displayed the different values of hours, minutes, seconds and ap/pm separately on line 5.
Here’s what the above code would look like in action:


