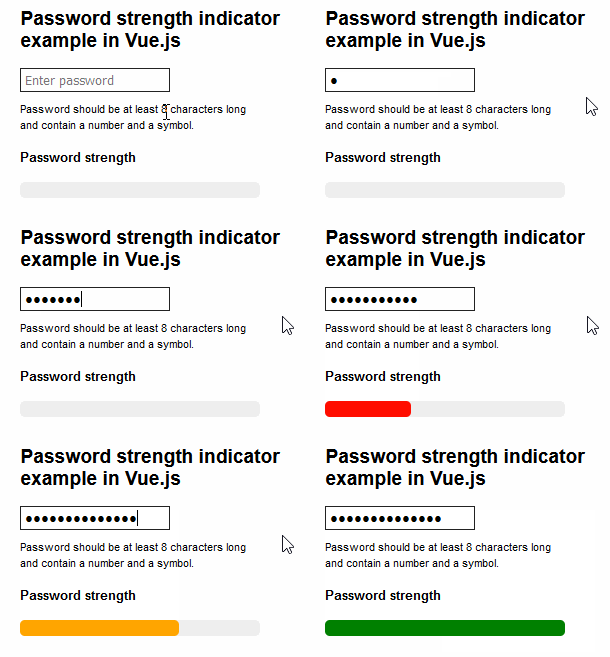
Showing a password indicator graphically is probably the best way to inform the user about their password strength. We can show different indicator colors and progress based on the entered password. These may depend on various factors like the length of the password, whether or not special characters are used in the password, etc.
Here’s an example to establish the same in Vue.js:
<template>
  <div id="app">
    <h2>Password strength indicator example in Vue.js</h2>
    <div>
      <input
        name="passwordInput"
        type="password"
        placeholder="Enter password"
        v-model="inputValue"
        @keyup="checkInputStrength"
      />
    </div>
    <div class="np-password-hint">
      <small>
        Password should be at least 8 characters long and contain a number and a
        symbol.
      </small>
    </div>
    <h4>Password strength</h4>
    <div class="np-password-strength-indicator-container">
      <div
        class="np-password-strength-indicator"
        :style="{
          backgroundColor: getIndicatorBackgroundColor(),
          width: getIndicatorWidth() + '%',
        }"
      ></div>
    </div>
  </div>
</template>

<script>
export default {
  name: "App",
  data() {
    return {
      inputValue: null,
      inputStrength: 0,
    };
  },
  methods: {
    checkInputStrength() {
      this.inputStrength = 0;

      const inputStrengthLengthCheck =
        this.inputValue && this.inputValue.length >= 8;
      const inputContainsSpecialCharacters = this.inputContainsSpecialCharacters();
      const inputContainsNumbers = this.inputContainsNumbers();

      if (inputStrengthLengthCheck) {
        this.inputStrength++;
      }
      if (inputContainsSpecialCharacters) {
        this.inputStrength++;
      }
      if (inputContainsNumbers) {
        this.inputStrength++;
      }
    },
    inputContainsSpecialCharacters() {
      const specialCharacters = /[`!@#$%^&*()_+\-=\\|,.<>?~]/;
      return specialCharacters.test(this.inputValue);
    },
    inputContainsNumbers() {
      const numbers = /\d/;
      return numbers.test(this.inputValue);
    },
    getIndicatorBackgroundColor() {
      let color = "gray";
      switch (this.inputStrength) {
        case 0:
        case 1:
          color = "red";
          break;
        case 2:
          color = "orange";
          break;
        case 3:
          color = "green";
          break;
        default:
          color = "gray";
      }

      return color;
    },
    getIndicatorWidth() {
      return parseInt((this.inputStrength / 3) * 100).toString();
    },
  },
};
</script>

<style>
#app {
  font-family: "Avenir", Helvetica, Arial, sans-serif;
  -webkit-font-smoothing: antialiased;
  -moz-osx-font-smoothing: grayscale;
  color: #000000;
  margin: 60px;
}
input {
  font-size: 16px;
  padding: 4px;
  border: 1px solid rgb(34, 34, 34);
  outline: none;
}
.np-password-strength-indicator-container {
  width: 300px;
  height: 20px;
  background: #eee;
  border-radius: 6px;
}
.np-password-strength-indicator {
  width: 300px;
  height: 20px;
  background: #eee;
  border-radius: 6px;
  width: 33%;
  transition: all 0.3s;
}
.np-password-hint {
  margin-top: 10px;
  max-width: 300px;
}
</style>

Code language: HTML, XML (xml)
In the above code, we have an even listener to the input field. Whenever the user types in something, we call the checkInputStrength method. This method checks for a couple of conditions. Whenever we get a true condition, we increase the inputStrength value by 1.
We then use the inputStrength value to select the color of the indicator and the completion percentage of the indicator.
We set the backgroundColor of the filled bar using the getIndicatorBackgroundColor. Then we set the background color as red, orange, or green depending on the inputStrength value.
On line 25, we set with width of the progress bar. We receive the width value from the getIndicator width method.
Here’s what the above code would look like in action:

You can find a working version of the above example from my repo links below:

