There are multiple occasions when a user may want to export some data as a report. You can always create an excel / CSV file on the server and send it to the user upon request. However, Vue comes with libraries which can handle all of it at the front-end itself. If you’re working on a Vue.js app, there’s a very high chance you’re dealing with JSON / JS Objects data most of the time. You can then extract the data you want from it, by probably mapping it to a new list. After that, you can use the library to convert and download the data. Let’s begin.
First of all, you’ll need to install the NPM package called export-from-json as follows:
npm install export-from-json --save
Code language: JavaScript (javascript)
Once you’ve installed the package, you can start using it.
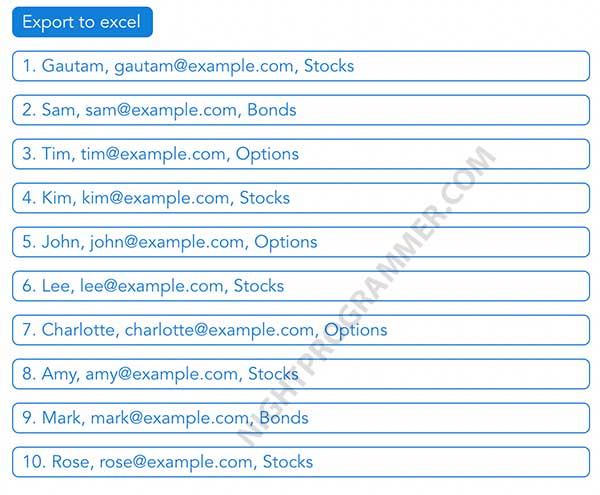
Here I’m writing some template code to show the ‘Export to excel’ button and the data itself:
<template>
  <div id="app">
    <div @click="downloadFile()" class="np-btn">Export to excel</div>
    <div v-for="(investor, i) in investorsList" :key="i">
      <div class="np-list">
        {{ investor.id + 1 }}. {{ investor.name }}, {{ investor.email }},
        {{ investor.investment }}
      </div>
    </div>
  </div>
</template>
Code language: HTML, XML (xml)
Export to excel button will call the downloadFile() method. Here’s the script code:
<script>
import exportFromJSON from "export-from-json";
export default {
  name: "App",
  methods: {
    downloadFile() {
      const data = this.investorsList;
      const fileName = "np-data";
      const exportType = exportFromJSON.types.csv;

      if (data) exportFromJSON({ data, fileName, exportType });
    },
  },
  data() {
    return {
      investorsList: [
        {
          id: 0,
          name: "Gautam",
          email: "gautam@example.com",
          investment: "Stocks",
        },
        {
          id: 1,
          name: "Sam",
          email: "sam@example.com",
          investment: "Bonds",
        },
        {
          id: 2,
          name: "Tim",
          email: "tim@example.com",
          investment: "Options",
        },
        {
          id: 3,
          name: "Kim",
          email: "kim@example.com",
          investment: "Stocks",
        },
        {
          id: 4,
          name: "John",
          email: "john@example.com",
          investment: "Options",
        },
        {
          id: 5,
          name: "Lee",
          email: "lee@example.com",
          investment: "Stocks",
        },
        {
          id: 6,
          name: "Charlotte",
          email: "charlotte@example.com",
          investment: "Options",
        },
        {
          id: 7,
          name: "Amy",
          email: "amy@example.com",
          investment: "Stocks",
        },
        {
          id: 8,
          name: "Mark",
          email: "mark@example.com",
          investment: "Bonds",
        },
        {
          id: 9,
          name: "Rose",
          email: "rose@example.com",
          investment: "Stocks",
        },
      ],
    };
  },
};
</script>
Code language: HTML, XML (xml)
And some CSS for the styling part:
<style>
#app {
  font-family: "Avenir", Helvetica, Arial, sans-serif;
  -webkit-font-smoothing: antialiased;
  -moz-osx-font-smoothing: grayscale;
}
.np-list {
  padding: 2px 8px;
  margin: 12px 8px;
  border: 1px solid #107fda;
  background: #ffffff;
  border-radius: 6px;
  color: #107fda;
}
.np-btn {
  padding: 2px 8px;
  margin: 12px 8px;
  border: 1px solid #107fda;
  width: 110px;
  background: #107fda;
  border-radius: 6px;
  color: #ffffff;
  cursor: pointer;
}
</style>
Code language: HTML, XML (xml)
As you can see, in the downloadFile() method, I’ve defined and initialised 3 constants:
- data: This is where I pass the array of data
- fileName: This is the default filename of the downloadable file. Of course, you can use some random name using a Math.random() function or using the current DateTime stamp using JavaScript.
- exportType: This is where you can specify the download file type. It supports csv, xls, xml, css, html as of writing this article. I’m using CSV for the demo (as CSV is often the go-to standard for exportable files).
Result
This is how the rendered view should look like:

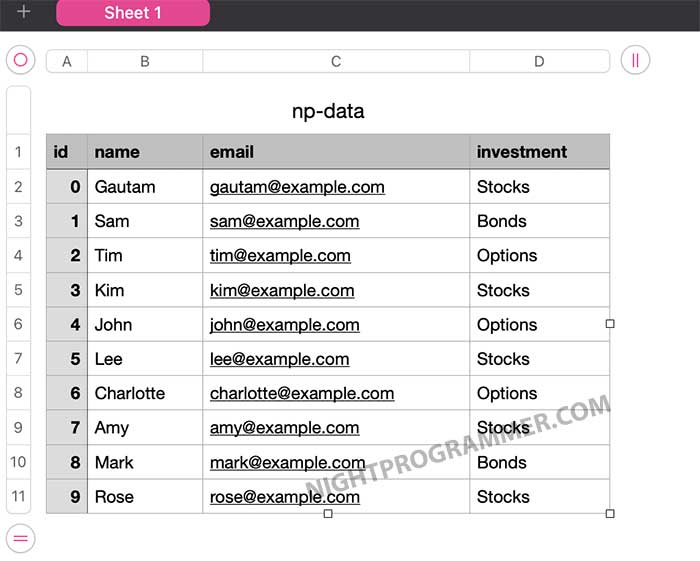
After exporting, you’ll the CSV / Excel data like this:

You can find the source code and demo from my repos here:
Github | Codesandbox | Demo
Note: The download won’t work on the Codesandbox link but will work on the Demo link. This is because it requires browser permission to download the file on the client side.

