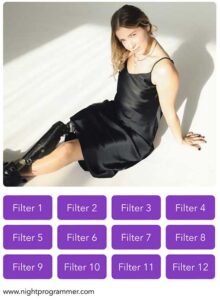
Gone are the days when you had to do image processing and manipulation to apply a filter to an image (image filter). The CSS filter property can create almost any filter you can think of. With proper proportions of brightness, contrast, opacity, saturation, etc, it’s possible to create infinite number of filters.
In this example, I’m going to show how you can apply CSS classes with predefined filters using Vue.js. I’ve chosen an image with high contrast ratio and mid shadows. This will help you see the changes better. Here’s the code I wrote:
<template>
  <div id="app">
    <div class="np-img-container">
      <img
        v-bind:class="['np-img-image', 'np-img-image-' + selectedFilter]"
        src="https://i.ibb.co/89KVhPQ/girl-filter.jpg"
        alt="np-image-preview"
      />
    </div>
    <div>
      <div class="np-filters-container">
        <div v-for="filter in 12" :key="filter" :class="['np-filter-img']">
          <div @click="applyFilter(filter)">Filter {{ filter }}</div>
        </div>
      </div>
    </div>
    <div class="np-credits">www.nightprogrammer.com</div>
  </div>
</template>

<script>
export default {
  name: "App",
  data() {
    return {
      selectedFilter: 1,
    };
  },
  methods: {
    applyFilter(filterIndex) {
      this.selectedFilter = filterIndex;
      console.log(this.selectedFilter);
    },
  },
};
</script>

<style>
#app {
  font-family: "Avenir", Helvetica, Arial, sans-serif;
  -webkit-font-smoothing: antialiased;
  -moz-osx-font-smoothing: grayscale;
}
.np-img-image {
  height: 300px;
  border-radius: 6px;
}
.np-filters-container {
  max-width: 430px;
}
.np-filter-img {
  display: inline-block;
  margin-right: 8px;
  margin-top: 8px;
  height: 20px;
  background: #833bbe;
  border-radius: 6px;
  color: #fff;
  padding: 10px 0px;
  min-width: 80px;
  text-align: center;
  cursor: pointer;
}
.np-filter-img:hover {
  background: #b160f3;
  transition: all 0.3s;
}
.np-filter-img:focus {
  background: #4a1972;
  transition: all 0.3s;
}
.np-img-image-1 {
  filter: unset;
}
.np-img-image-2 {
  filter: brightness(200%);
}
.np-img-image-3 {
  filter: contrast(200%);
}
.np-img-image-4 {
  filter: drop-shadow(8px 8px 10px gray);
}
.np-img-image-5 {
  filter: grayscale(100%);
}
.np-img-image-6 {
  filter: blur(5px);
}
.np-img-image-7 {
  filter: hue-rotate(90deg);
}
.np-img-image-8 {
  filter: invert(100%);
}
.np-img-image-9 {
  filter: opacity(30%);
}
.np-img-image-10 {
  filter: saturate(8);
}
.np-img-image-11 {
  filter: sepia(100%);
}
.np-img-image-12 {
  filter: contrast(200%) brightness(150%);
}
.np-credits {
  font-size: 12px;
  margin-top: 12px;
}
</style>
Code language: HTML, XML (xml)
From the code you’d notice that I’ve conditionally bind a class np-img-image-<selectedFilter>. Here selectedFilter is a local state whose value varies between 1 and 12.
On line 12, you’d notice that I’ve iterated over and created a set of 12 buttons Filter 1, Filter 2, Filter 3,…Filter 12. Whenever you click on any of these buttons, say for instance Filter 5, applyFilter() method gets called. applyFilter() method will apply the passed value 5 to the selectedFilter state. This in turn, will assign the class np-img-image-5 to the ima element on line 5.
I’ve then defined classes starting from np-img-image-1 through np-img-image-12 from line 72 to 105 with different variation of filters.
Here’s a preview view of the code run:

Demo links:


